Monday, July 11, 2011

July 9th Update Part 2 --- Indoors

After the bugs became unbearable, we moved the party inside. Luckily for the clock's sake... Allmendinger was running in 28th place the entire night for the inaugural Nascar Cup race at Kentucyk, so I was able to tune it out.

This is the Asprind clock after Collin attached the UV cold cathode. This is used to light up the clocks green phosphorescent surface.
Installed a green switch onto the Dream clock. We actually ended up installing a switch onto the Asprind clock too -- but I don't have any pictures of it. It was a red switch I cut out of the PCI connection that came with the cold cathodes. Glad I didn't throw it away!
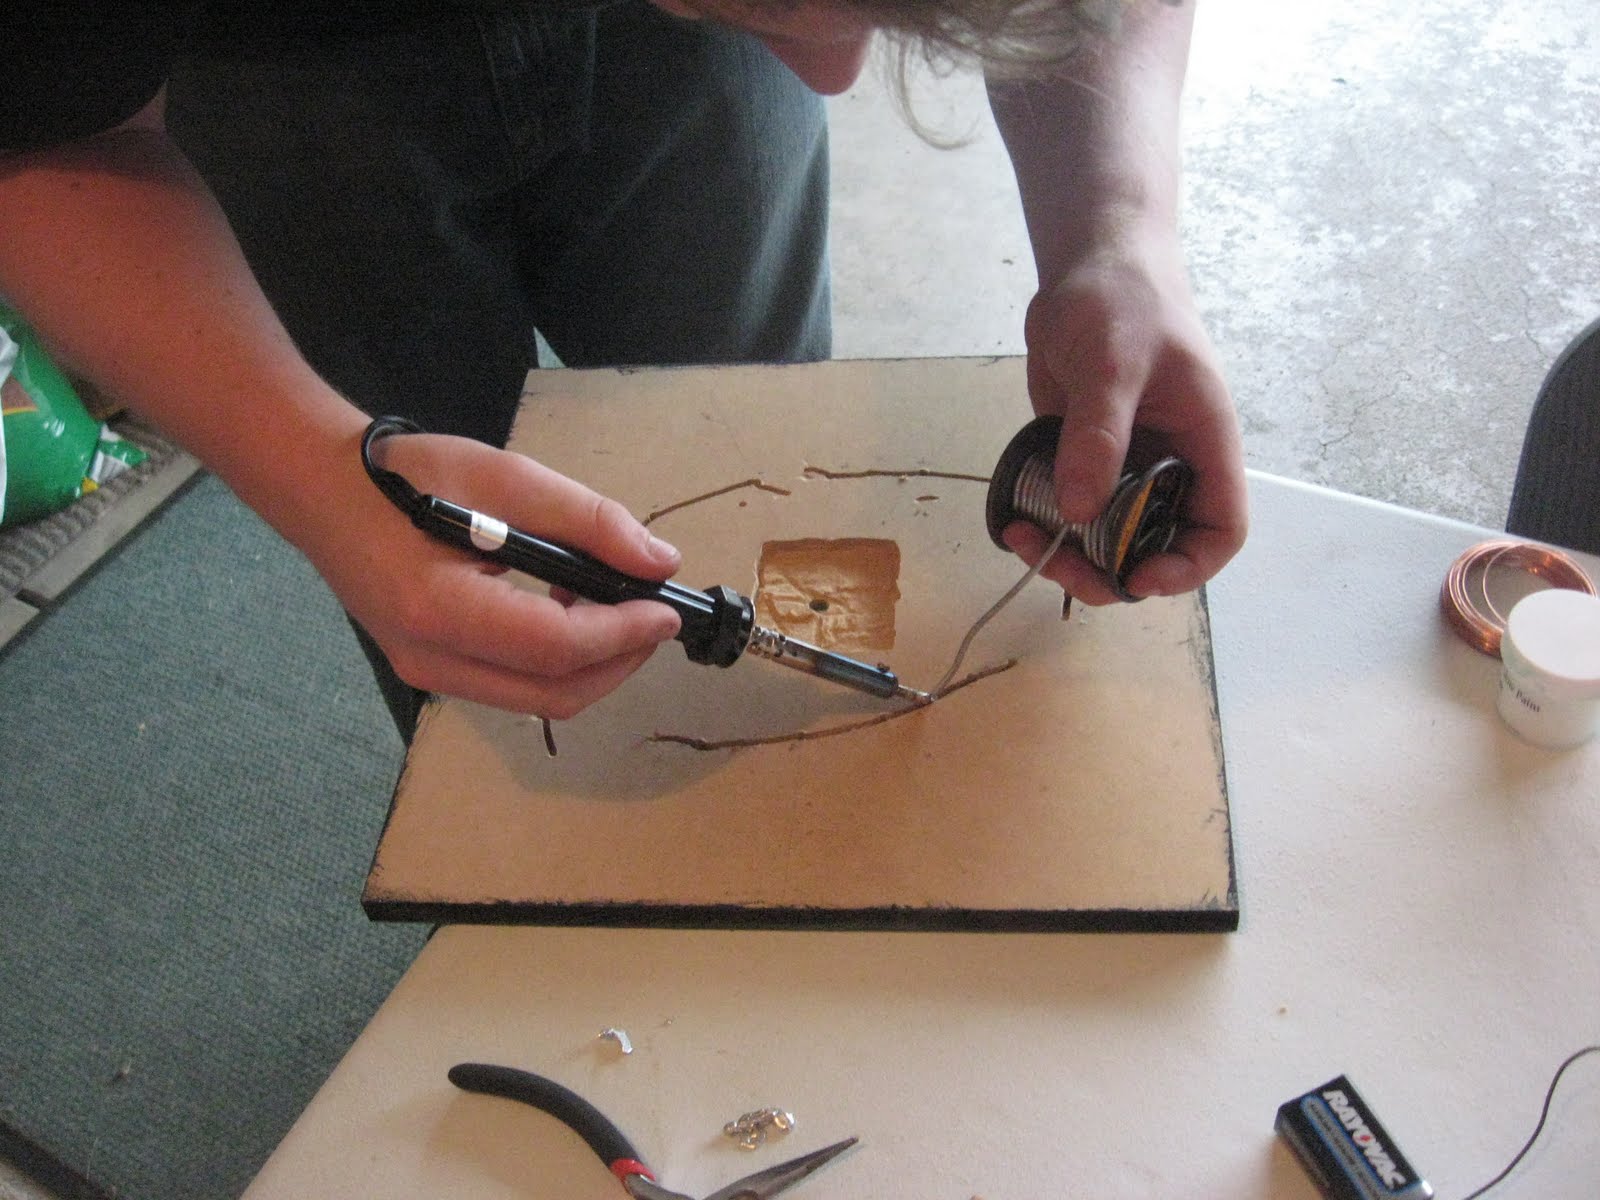
^ It was about this point that I started swearing. I broke a pin out of one of the RGB LEDs. So, the entire clock wouldn't work, and it would take me quite a while to get a replacement. Somehow, I managed to burn off enough of the plastic with the soldering iron to expose a stump of the positive lead on the LED. I had Collin hold the pliers over the negative lead of the LED, and I dumped a bunch of solder onto it. It worked...
Collin finishing up the electronics on the Asprind clock.
The face of the Dream clock.

I had an extra green cathode tube, and I wanted Collin to put it on the back of the Asprind clock to light the wall behind it. After some initial apprehension, he agreed to check out what it looked like. I think it looks absolutely awesome. Oh, and these pictures came out awesome too! Looks like he's handling a nuclear pellet or something. Certainly more dangerous looking than the Mooninites in Boston..
The three clocks. At this point, the clock clock and Asprind clocks are complete. I still need to paint the Dream clock with Fitz and several more stars in phosphorescent paint. I saved one UV LED that is on a platform over the top that is aimed to shoot down on the surface.

The clocks in the dark.
This is how they look in the light.
Here is a very quick movie that shows how the LEDs blink on the Dream clock. The two series blink at different rates, and it came out pretty well.

Finally, these are two movies where I walk past all three of the clocks. I included both movies (which are essentially the same) because it's funny to listen to our dialogue in the first video and my narration in the second.

So there you have it! 2 clocks are now complete. The Clock clock and the Asprind clock. The dream clock is nearly done too --- all it needs is a Fitz and some stars painted on it.

Sunday, July 10, 2011

July 9th Update Part 1 --- Outdoors

This is the outdoors version of July 9th --- before the bugs got too bad to be in the garage.

Alright, well, I have some big updates from this Saturday! My friend Collin came out from Madison for the weekend, and he was on board with building a clock with me. Actually, he would build one, and I would build my main one. However, I got side-tracked again when I realized that Aaron had sent me some extra flashing RGB LEDs. As I was rewatching 12oz on my laptop to take screenshots of certain characters.. I noticed that the lights would be perfect to create the dream scene when Fitz is floating around in black space with colorful stars all around him. So, that's what I started. Collin, on the other hand, would be building the Asprind clock.


This is the beginning of the Asprind clock. There will be 12 yellow LEDs going into each of those holes that were drilled. On the back of the clock, I drew out a grid and placed the LED locations on the line connecting the time (12,1,2,3pm..) to the center. So, while it looks like an oblique ellipse, the LEDs actually act as numerals of a normal clock. Just a little abstract.

Both the Asprind clock and Dream clock got a coat of black paint.
We made the decision that one of the UV cold cathodes was going to make its way onto the Asprind clock. So, Collin covered the black paint in a thin layer of florescent green paint. It gives it a really eery and textured look to it.

^ I made Collin rout wells to lay copper wire in. This made connecting the LEDs with solder about 10 times easier than the clock clock I made first. Oh yea, "Hi", Collin.


Me soldering.
This is how I feel after finding out my soldering didn't work, and I need to redo it.


If you can tell by all the penciling on the back.. things are always more complicated than they seem at first.

Saturday, July 9, 2011

July 4th Update --- Finished the first clock

Well, a lot of frustration, ingenuity, help, and Miller Genuine Draft got the first clock done! Honestly, it came out way better than I ever thought it would. The electronics and everything feel solid now after all the glue and solder I dropped on them!

Here's me testing the fire before I glued it all in.


And here is what the clock looks like with just the white base, switch, and lights on.

I think this is the first time I have used an artistic paint brush since 8th grade. I think I somewhat got the crayon look of the clock in 12oz.

Here's where I got a little artistic. I painted a digital looking "2:22" all over the white area of the clock. The paint is done in phosphorescent red paint that lights up under UV.

Next to a picture of the clock from Corndogcentral.com

Those caps over the clock may make it look a little worse in the day, but they direct the beams of light from the LEDs onto the clock's surface to make the 2:22s all light up. Directing the light of the UV leds was a problem, and the answer was... Cut the beer cans up that we were drinking and mold them into hoods!

And this is what you get!
Oh yea, decided to paint the hands with yellow fluorescent paint too. Because, it's way more awesome that way.

Sunday, July 3, 2011

July 3rd Progress

So, I got the clock clock all wired up and glued in. Just put a coat of paint on it.

I went to RadioShack earlier today to grab some 9v battery caps so that the battery can be easily changed. Now, I just need to figure out how I'm going to attach the battery to the clock. I kind of like the idea of velcro..

Friday, July 1, 2011

FOR GRAET JUSTICE

Alright --- more to come later. But, SUCCESS SO FAR!


That took me nearly 3 hours to complete. So while it may look like bulljive to you, I'm proud of it!

Thank you, Aaron

The LEDs have come in courtesy of USPS and Aaron.

I've got a lot of ideas on how to wire these things up--but no good ones..